Here’s how to make an epic (and affordable) Miniature Drying Rack!
If you’ve ever painted a bunch of miniatures at once, you know the struggle is real when it comes to finding a safe spot to let them dry. Half the time, mine end up teetering on the edges of cardboard boxes or awkwardly balanced on paint pots. Not ideal.
It’s cheap, it’s customizable, and honestly, it makes you feel like you’ve leveled up your painting game big time. Whether you’re into Warhammer, Dungeons & Dragons, or board games with plastic heroes galore, this is a great weekend project to support your painting station.
Why Build One?
Typically, most of us don’t have the luxury of a professional painting studio. Space is limited, and drying time is precious. A homemade drying rack not only keeps your minis organized and safe, but it also makes batch painting so much smoother.
Plus, there’s just something satisfying about building a piece of gear for your hobby with your own two hands.
What You’ll Need
The best part? You can probably build this with stuff lying around the house—or pick up everything for under $20 on Amazon.
Materials:
- 1 wire cooling rack (like for baking cookies)
- 2 wooden dowels or chopsticks
- A small foam board or scrap wood base
- Zip ties or twist ties
- Super glue or a hot glue gun
- Optional: spray paint, stickers, decals to customize it
Step-by-Step Instructions
1. Pick Your Base
Your base can be anything from a chunk of foam board to a leftover piece of MDF. I used a small wooden plaque from the craft store. It should be wide enough to keep your rack stable—think 10” x 6” or so.
2. Mount the Dowels
These will hold up the rack. Use glue to attach the two dowels vertically on the left and right side of the base, like little pillars. Make sure they’re evenly spaced so your rack will sit level.
3. Attach the Cooling Rack
Use zip ties or twist ties to fasten the wire cooling rack across the tops of the dowels. If you want to get fancy, glue or drill little grooves into the dowels to help the rack sit snugly.
4. Customize It
This is where you make it yours. Spray paint it black and add silver runes with a paint pen. Stick on a sticker of your favorite faction. Name it “The Rack of Holding.” Whatever feels right.
5. Use It!
Once it’s done drying, just place your minis on the wire rack using little poster tack, bottle caps, or painting handles. Now they can dry safely without risk of tipping over or getting stuck to paper towels.
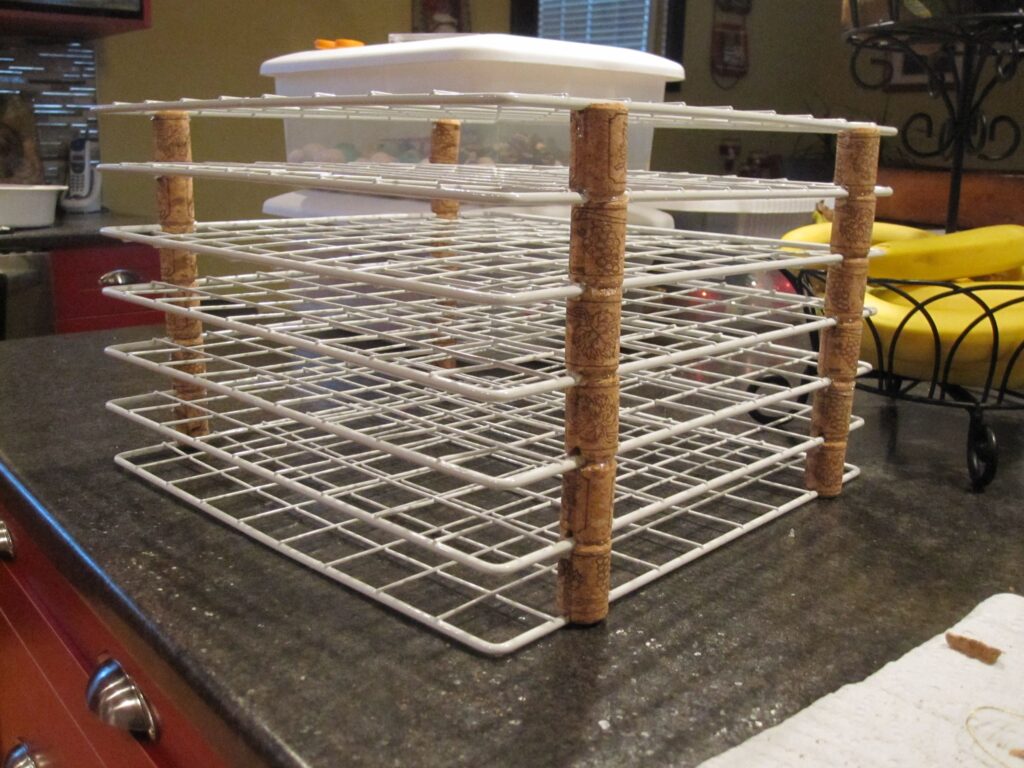
photo by: 2007jeanett.blogspot.com
Bonus Tips
- Add a second tier if you want to go full dungeon architect. Just repeat the process with longer dowels.
- You can loop binder clips on the wire to hang sprues or hold parts while they dry from spray primer.
- If you’re painting big batches (hello, orc army), build two and stack them like nerdy bunk beds.
Total Cost: Around $15
Total Satisfaction: 10/10
This is one of those crafts that makes your life easier and scratches the creative itch. Plus, it’s a great first project for someone just getting into miniature painting—especially younger hobbyists or folks looking to upgrade from “cardboard box and a prayer.”
Final Thoughts
You don’t have to spend a ton of money to enhance your hobby setup. Sometimes the best tools are the ones you make yourself—and this drying rack is a perfect example. It’s sturdy, compact, and makes you look like you’ve got your painting life together. What’s not to love?
So go grab some supplies, throw on your favorite fantasy playlist, and knock out this project before your next painting session. And hey, if you build one, tag us in your pics—I’d love to see what creative spins you put on yours!
Happy crafting!